Guide to Managing SMTP Restrictions in WHM/Cpanel
When running a cPanel/WHM server, managing SMTP Restrictions is essential for controlling outgoing mail and preventing spammers from abusing your mail server. This guide will walk you through the step-by-step process to enable or disable SMTP Restrictions in WHM and explain why it is important for server security.
Why Are SMTP Restrictions Important?
SMTP Restrictions prevent users from bypassing the mail server to send mail directly to remote SMTP servers. This bypass is a tactic often used by spammers to exploit server resources, making your system vulnerable. With SMTP Restrictions enabled, only root users, Mailman, and Exim (the server’s mail transport agent) can send mail, ensuring secure and controlled email management.
Steps to Manage SMTP Restrictions in WHM
Before you begin, remember that WHM access requires root-level permissions. This means shared or business hosting clients without root access won't have this feature available. If you're unfamiliar with WHM, check your hosting provider’s documentation on how to access WHM.
Step 1: Log into WHM
To get started, log into your WHM dashboard using your root credentials.
Step 2: Navigate to SMTP Restrictions
There are two ways to find and manage SMTP restrictions in WHM:
Option 1: Using the Search Function
- Once logged in, use the search bar in the WHM dashboard.
- Type “SMTP Restrictions” in the search bar.
- Under the results, click on SMTP Restrictions (located in the Security Center).
Option 2: Accessing via Security Center
- Go to Home >> Security Center >> SMTP Restrictions.
- This will take you directly to the configuration panel for SMTP restrictions.
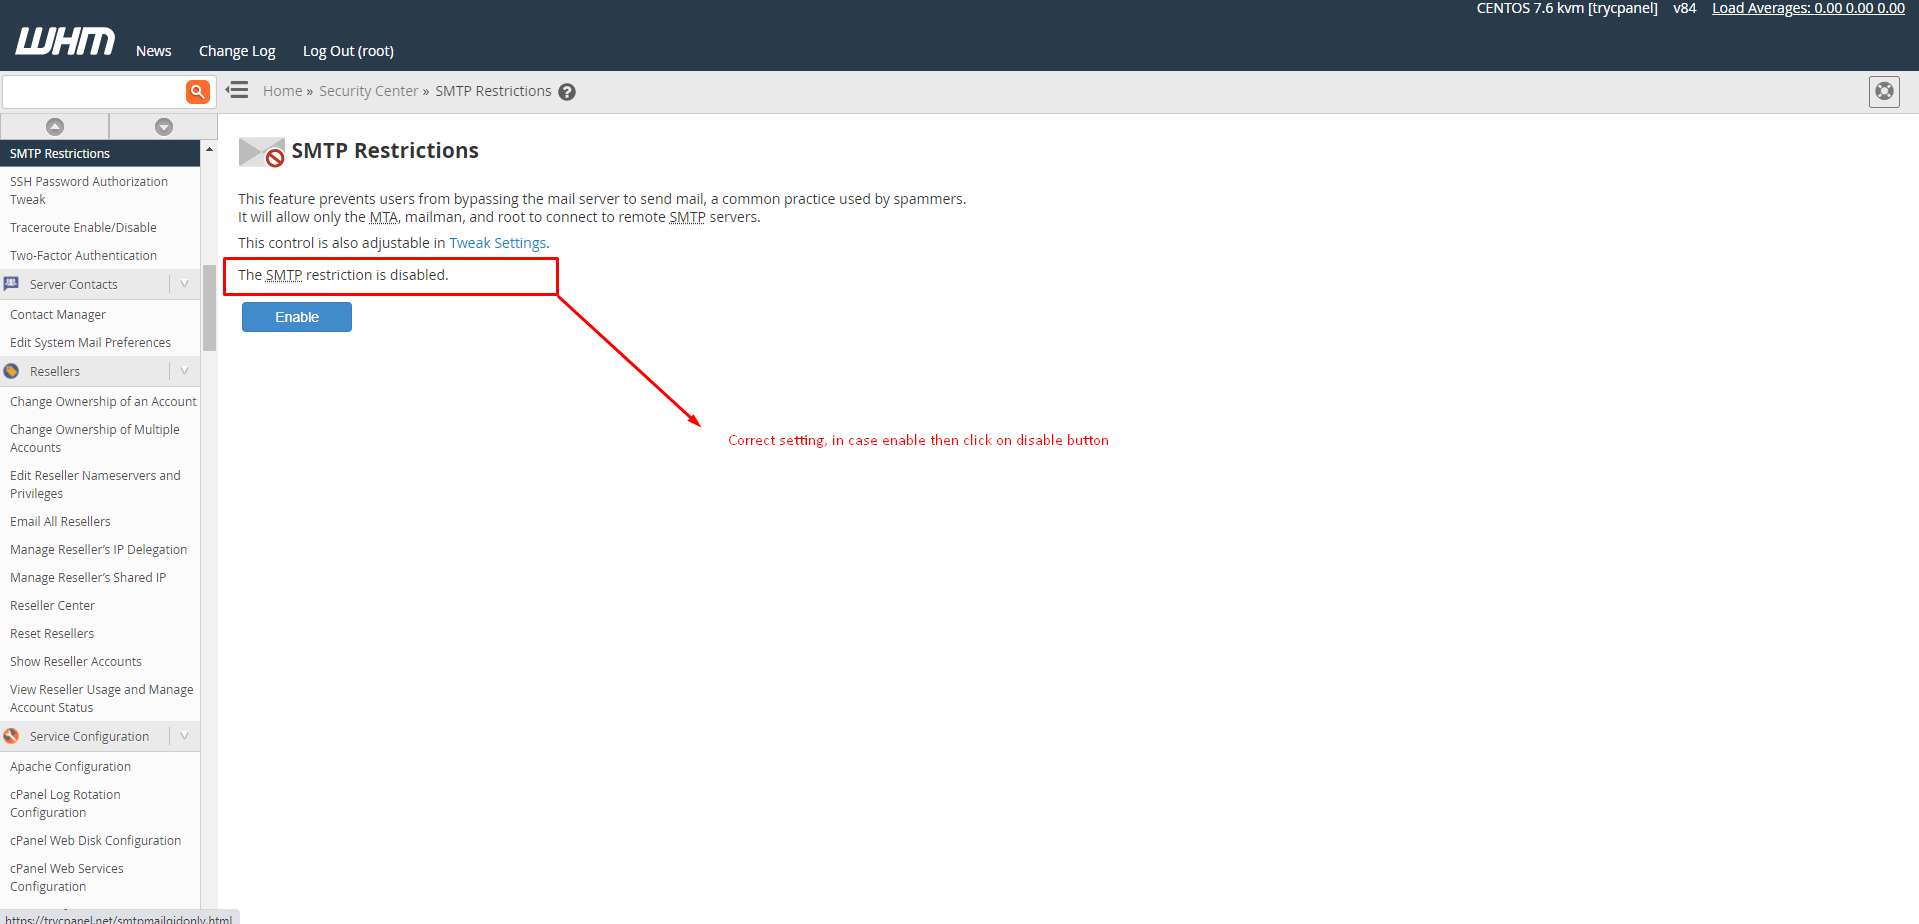
Step 3: Enable or Disable SMTP Restrictions
In the SMTP Restrictions interface, you will see an Enable/Disable button:
- Enable SMTP Restrictions: This will restrict outgoing SMTP connections to only the root user, Mailman, and Exim. Enabling this is highly recommended to block unauthorised mail from your server.
- Disable SMTP Restrictions: This option removes the restriction, allowing users to send mail through external SMTP servers, which can pose a security risk.
Step 4: Adjust Additional SMTP Settings (Optional)
You can fine-tune your server’s mail handling by accessing the Tweak Settings in WHM:
- Go to Home >> Server Configuration >> Tweak Settings.
- Scroll to the Mail section to find options related to SMTP.
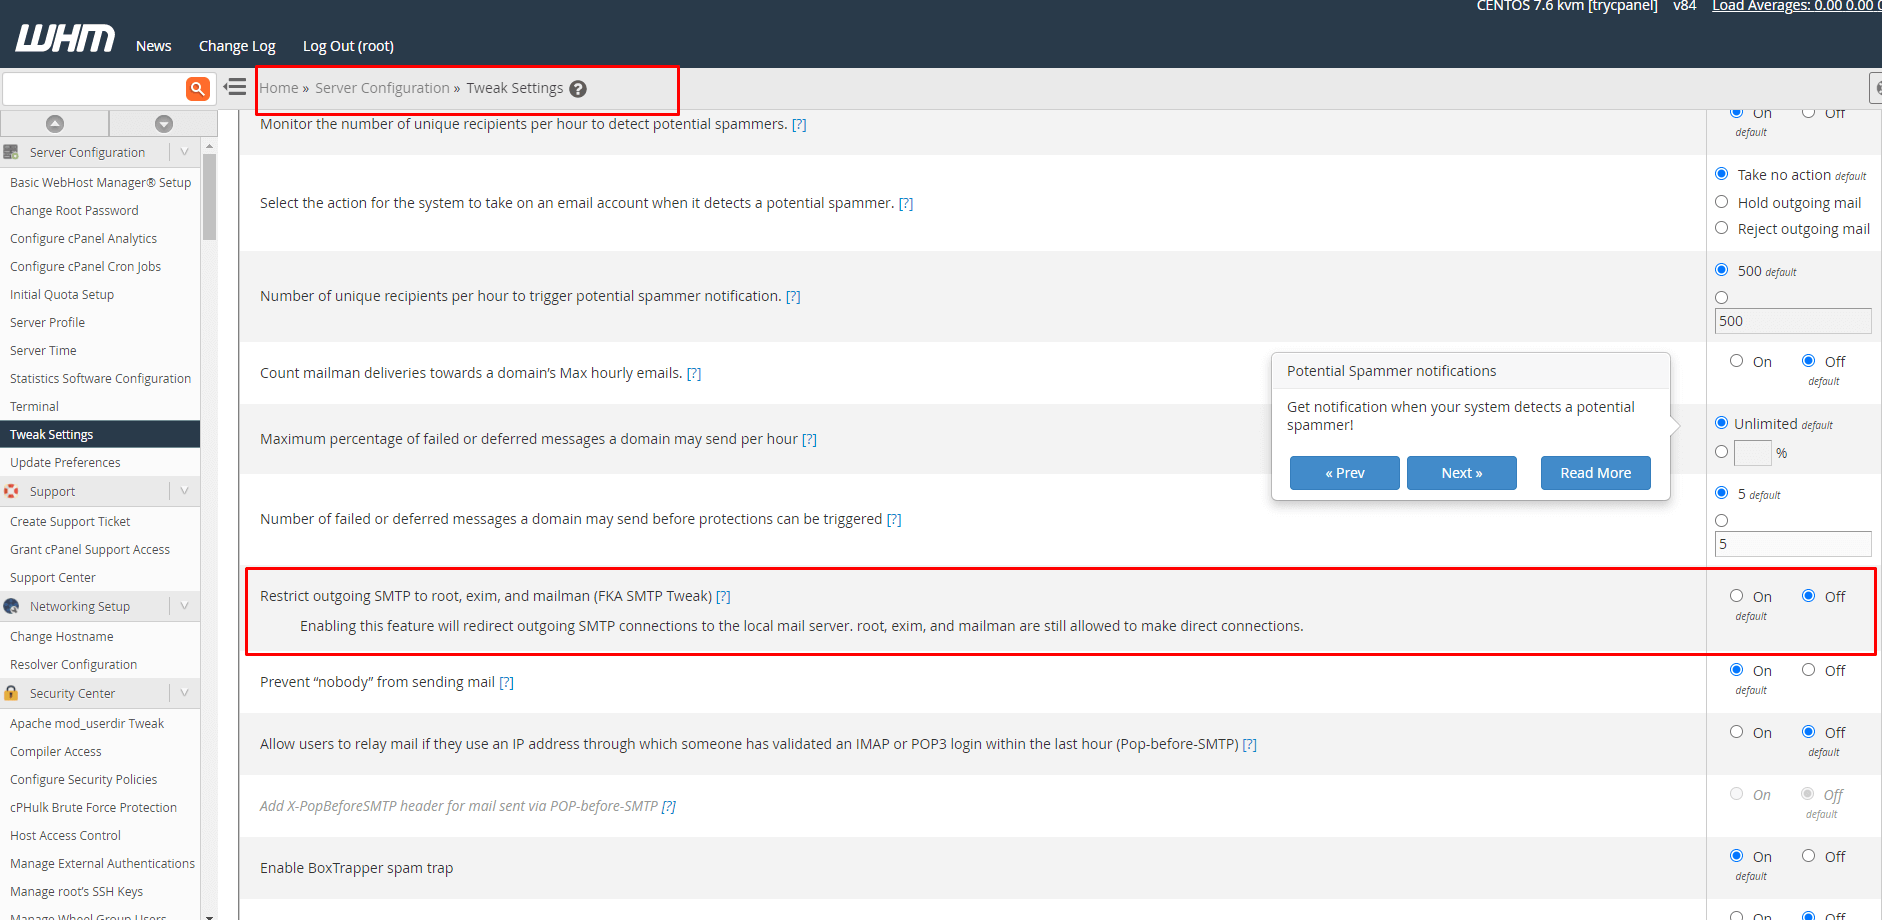
Key settings include:
- Restrict outgoing SMTP to root, Exim, and Mailman: This setting limits outgoing mail to essential services.
- Pop-before-SMTP: Allows users to send mail if they have successfully logged into IMAP or POP3 within the last hour from the same IP address.
- Add X-PopBeforeSMTP header: Adds a special header to outgoing mail sent via the Pop-before-SMTP method, which can help in tracking email origins.
Further notes...
Shared Hosting Limitations: SMTP restrictions are typically available only to those with WHM access, which is usually root or VPS users. If you're on a shared hosting plan, you may not have access to this feature.
Security Best Practices: Keeping SMTP restrictions enabled is crucial for preventing mail abuse and ensuring that your server is not used for spamming activities. If you're unsure about making changes, consult your hosting provider or system administrator.